Aurora's Development Journey

Only some of the features in the game demo are described in this page. I will gladly answer any questions about the other features in interviews. 😉

This page is NOT optimized for mobile viewing. Sorry.

Intention

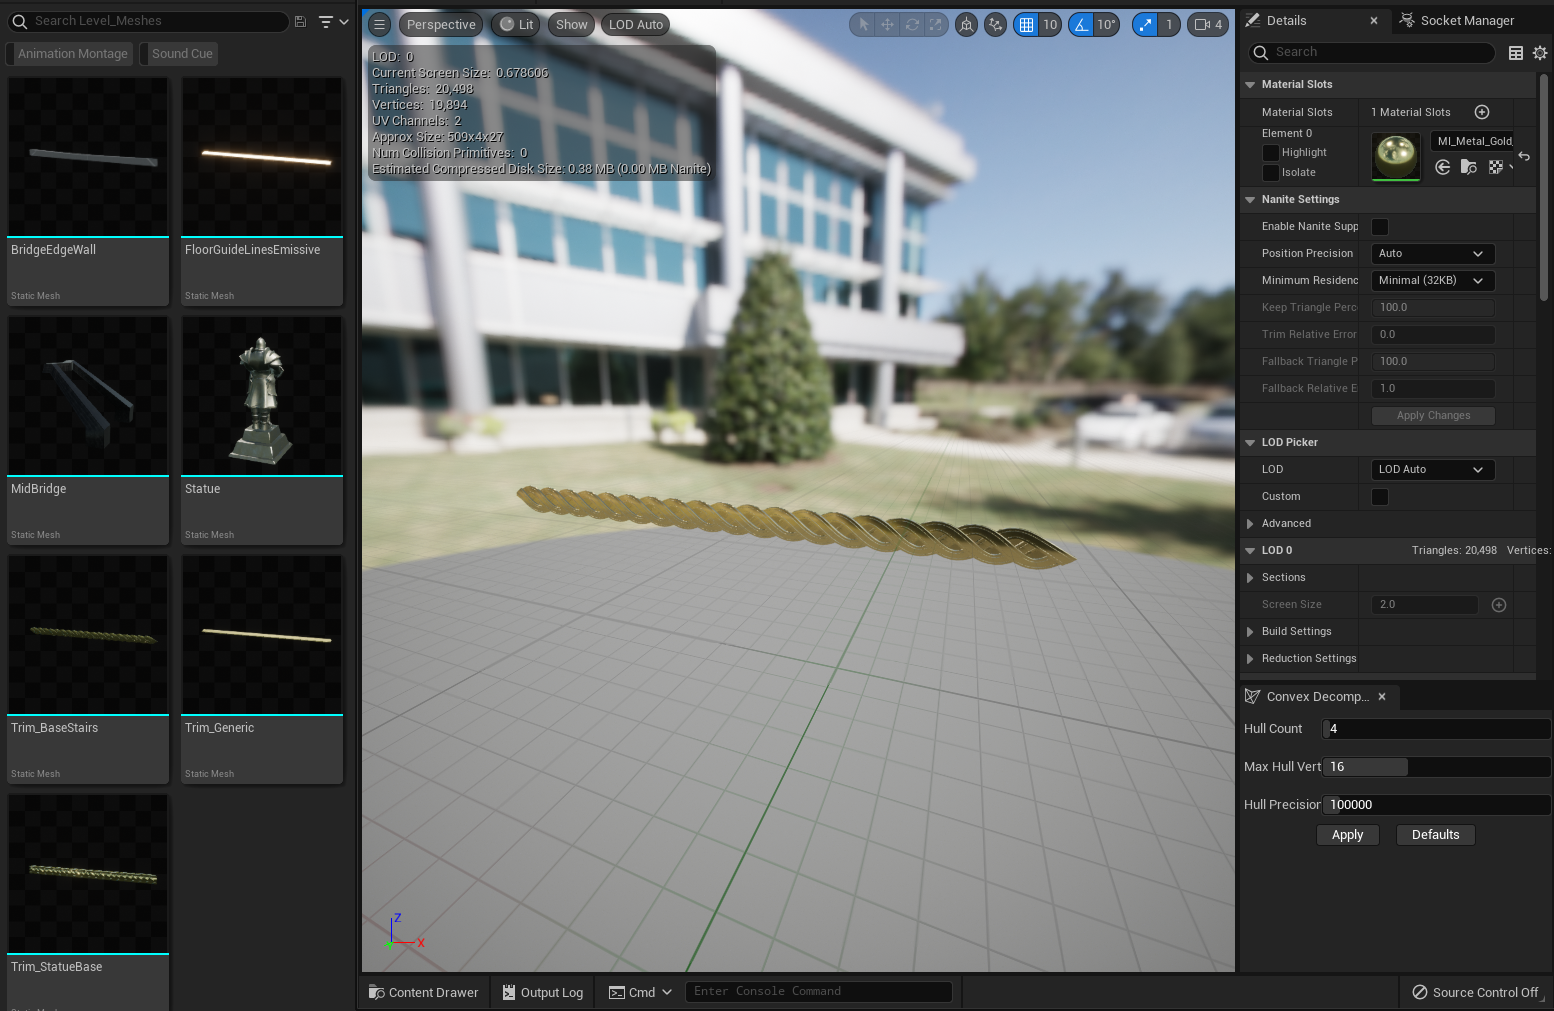
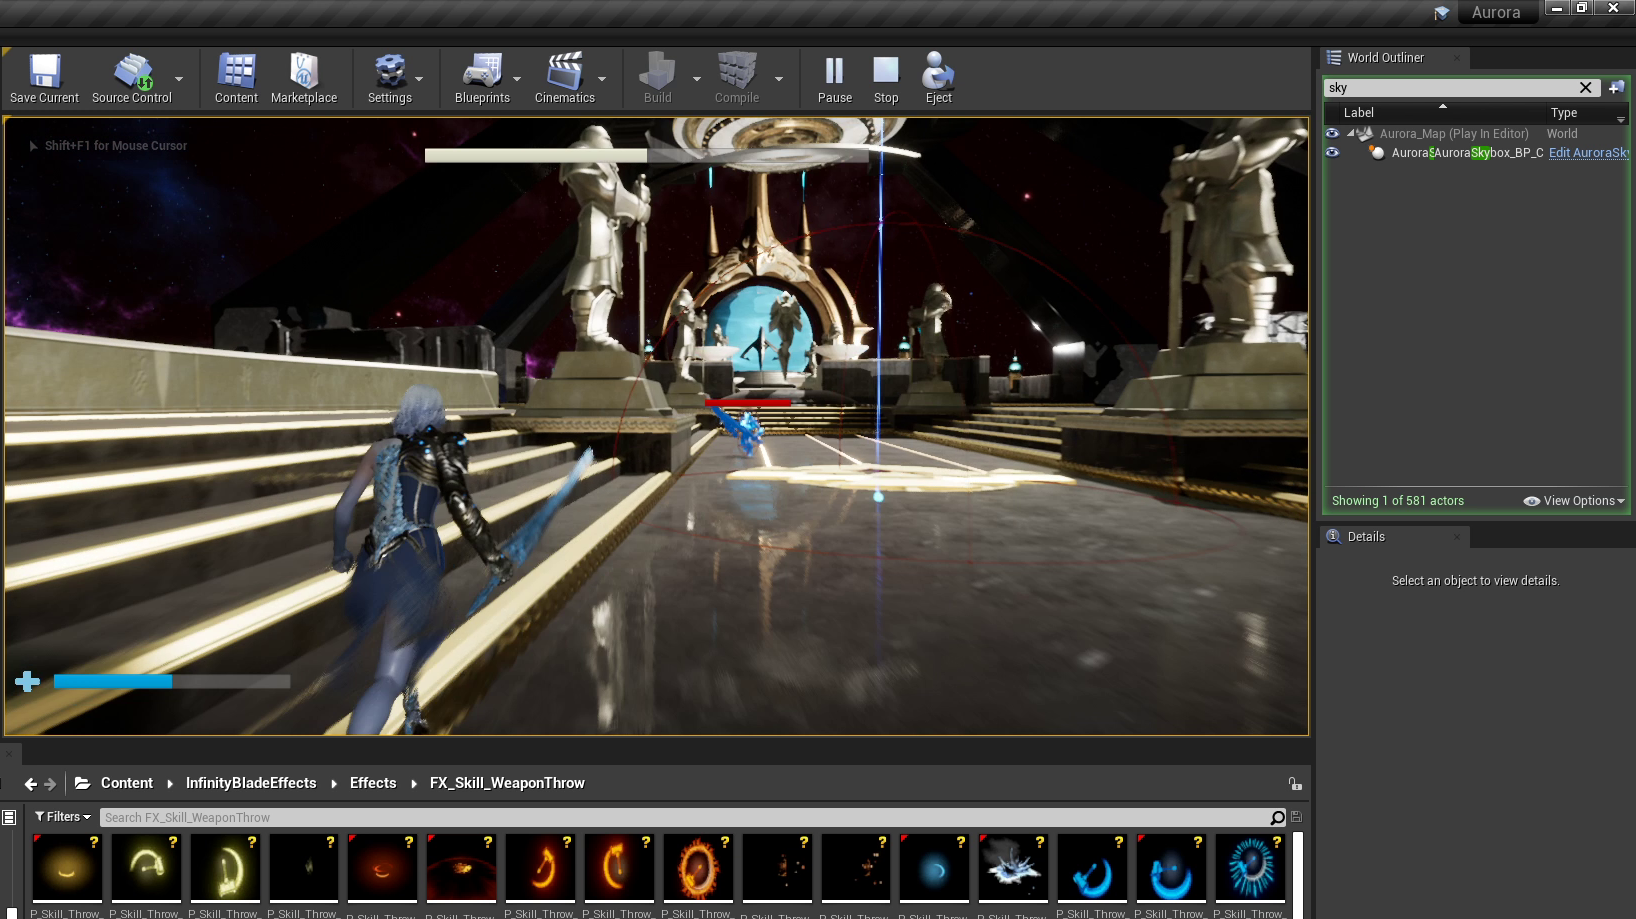
I developed this demo to demo-n-strate my Unreal Engine capabilities. While I have ensured the basic features of a simple 3rd-person melee combat game is to be executed well, I brought on more focus to sequences and animation, as I believed cinematics is my thing and is fun to do.

This project actually started in Unreal Engine 4.6. When I picked it up again in Oct 2022, I successfully converted it to Unreal Engine 5.0.

Inspiration

For avid gamers out there, can you guess the name of the game from which many elements in this demo is based on? It is a popular game which I like a lot but does not fall into my top 10 category. To be honest, I was unaware of the similarities of some of my design decisions at first... until I recently played it again. Did the unconscious part of me somehow influenced the inspirations? Is my keyboard an Altered item?

Hint: The game was developed by Remedy Entertainment. 😄

Goal

At conception stage, I was browsing through all of the assets that came with the Paragon packs and found that there were really eye-catching and interesting materials, animation and special effects. It got me hyped up.

So I picked up the project again with a goal in mind - to develop as many features as I can within a self-stipulated time, so I can use most, if not all, of the animation and special effects provided. In essence, primarily I want the animation provided to drive the gameplay and cinematics in a creative way.

This project turned out to be more of a Paragon Hero appreciation demo. 😄

But Why Aurora?

I came across this Hero character in the UE Marketplace and know for certain I would want to showcase my Unreal capabilities with her. Also, I like all things Aurora, the magical waves in the sky of Iceland, the beloved Norwegian singer, sleeping...

Commit History

It is nerve-wrecking to show my commits for this project. 😅 But nonetheless, it is only appropriate to do so for an aspiring Unreal Developer.

These are commits from the start of the project up until the project is cleaned and ready for packaging.

Commit History for version 1.1
Aurora Project Source Code

Level Creation

The level was created with assets from the Paragon Props pack in the UE Marketplace. It is heavily inspired by the Bridge sub-level in Niflheim from God of War (2018) and its sequel.

Inspiration

The image above is a screenshot from God of War (2018), showing the Niflheim bridge.

Completed static assets placement of the level. No blocking was initially done prior to this.

Custom Meshes

These are tiling meshes, which I created from scratch using Maya 2020, used in the level.

Combat and Gameplay Features

I wanted to showcase a simple melee combat system with 2 abilities. So the demo has only melee-type enemies. In the conception of the project, I wanted to add a ranged enemy type but discarded that as I wanted to finish my project within the time I stipulated. I will create this in my next project, hopefully.

Aurora

  • Aurora has combo attacks, which consists of 3 animation. They came pre-configured in Blueprint but I converted them to C++, because I wanted to add more stuff to it.
  • Aurora has 2 abilities. Each ability call consumes a certain amount of Energy from her Energy pool, which is represented by the yellow bar at the top of the screen.
    • Notice that this bar is separated into 2 parts (there is a gap).
    • If Aurora's Energy pool is completely depleted after an ability call, she will go into the Exhausted state, in which she will not be able to move, and becomes vulnerable to attacks.
    • During the time she is in the Exhausted state, she will be recovering Energy (the only function that uses her own Actor Tick). The Energy bar will slowly replenish by itself over a certain duration.
    • After it fills up only the first portion of the bar, she will recover, be able to move and stops replenishing.
    • The Aurora character class has Energy states, that determines her animation and controls.
  • Aurora can pick up Health or Energy fragments, spawned from defeated enemies, to replenish her Health and Energy.

Melee Enemies

  • Hitting an enemy will cancel any attack animation it is currently playing. However, this does not apply to the Aurora character.
    • I pulled out the Interrupted pin off the animation node to finish its BT Task, leaving it to immediately play the Hit React animation.
    • For Aurora, her class has the Movement states. I placed a conditional such that she will not react to being hit while she is attacking, thus not canceling her attack animation.
    • This gives players way more advantage. But as I said in the main page, this is intended.
  • Enemy should have a small delay between attacks.
    • They were chaotically dangerous without it. Their attack animations are pretty fast compared to Aurora's default one.
  • Enemies have a limited sight detection range. If they do not see Aurora within a certain radius (currently set at 500m), they will wander about. This is controlled in its AI Behavior Tree.
  • All melee enemies (not the End Game Boss though) will enter Stun state whenever they are hit by any of Aurora's abilities. Melee enemies have movement states that determine the animation and AI Behavior.
  • There are 2 melee enemy variation. The stronger one (which can only be spawned at the upper part of the level) was a child of the base Melee Enemy class.

Enemy Animation

  • Each melee enemy has 2 swords but it can swing them in a variety of ways - one sword only, either with its left or right arm first, or both swords at the same time. Furthermore, there are a few variation for each way. Which animation to play is random.
  • There are also 5 different death animation for this enemy. The animation to play depends on what killed it and how, but there is a 35% chance of playing the "kneeling" if it was killed by Aurora's sword.

Reacting to Hits

Both Aurora and Melee Enemy characters will play an animation when they are hit, what animation to be played depends on the direction the hit came from.

Hit React Animation

Both Aurora and the Melee Enemy class have 4 hit react animation each, for when they are hit from the Front, Back and their sides.

How was this done

It was a simple "know where the actor who hit you is standing at" solution. It did not involve physical assets or anything similar that is complex.

← This is my sketch of the logic for knowing the direction. I've separated an actor's angle into 8 segments. If the hit comes from the front, then it is Segments 1 & 8.

  • FindLookAtRotation is the key function to use here. It gives you the rotation value of an actor from the owner.
  • However, the angle needs to be recalculated in respect to the owner.
  • The class requires at least 4 animation, otherwise the editor will display an error when it tries to play a Hit React animation upon being hit.

However, to ensure that designers or integrators have assigned the correct number of animation in the Blueprint, I left a small note on the attribute in the Details panel. This was done with meta specifiers.

Enemy Spawn Manager

Functionality

  • Each trigger of the Enemy Spawn Manager by Aurora will spawn waves of enemies. A new wave will begin after the last enemy in the current wave is defeated.
    • The straight forward way to do this is to use "Get All Actors of Class" each time an enemy is killed to check if there are anymore enemies left in the level by comparing their numbers. However, this will probably cause performance issues if let's say there are 100 enemies on the level!
    • What I did was to create a delegate on the Enemy class and broadcast about its death to the Spawn Manager just before it is destroyed. The Spawn Manager will do the comparing of numbers and determine if the current wave has indeed ended.
  • The number of waves increases by 1 for every subsequent trigger, up to a specified maximum number. It starts with at least 2 waves.
  • For each wave, a specified number of enemies will be spawned. Together with the number of waves, these numbers are adjustable (user-defined) in the actor's Details panel.
  • Each enemy will spawn on scene with an interval in between spawns.

Details panel - Enemy Spawn Manager variables.
  • Whenever a new wave starts, an environment event sequence is played. This includes the increasing (and then decreasing) of the rotational speed of various revolving actors in the level. They are communicated to the manager via the use of Event Dispatchers in Blueprint instead.
  • Giving player time to breath, they have to wait for a short duration, determined by the Trigger Interval, before she can trigger the next group of waves. This, and many other time-based functions in this project, are handled by the World Timer Manager with timer handles in C++.

Blueprint Widgets

  • Spawn locations can be specified either by manually inputting the coordinates...
  • Or, using the widgets provided with the Blueprint. They are created using meta specifiers (note though that this type of widget only works with struct variables, eg. vectors).

Dash Ability

Inspiration

First of all, I had never played (and still have not played) Paragon, the game of which these Epic Games assets came from.

  • While I was browsing through the assets from the Paragon Aurora pack, I came across a singular SFX folder that is called "Dash".
  • From instinct, (and probably due to experience from playing games for more than half of my life), I deduced it could be an ability where Aurora lunges forward over some distance at a high speed. It immediately made me think of Mass Effect!

  • I love Mass Effect Andromeda! (and the infamous trilogy, and also its Remastered version!) Despite its chaotic, buggy launch, the combat with the variety of abilities is so addictive. The ambience, biomes and world-building makes it so immersive too! Best played on PC with better hardware!
  • Apologies I digress. But the coolest ability in the game, in my opinion, is the Biotics ability called "Charge". When this ability is activated, the player character will flung herself in the direction she is facing at high speeds. This is even cooler when the ability is activated while she is in the air.
  • I take some reference from there.

Implementation - Impulse or Add Force to "Dash"

This was quite an onerous undertaking for me. New to developing in-game abilities in Unreal Engine, I had difficulty deciding what is the best approach for Aurora to "dash".

  • After scouring the Internet for a while, I decided to use Impulse at first.
  • However, it feels too instantaneous. On top of tweaking the Impulse value with Velocity Change set to false, it also involves tweaking the Braking Friction and its Factor value in her Character Movement component.
  • After spending hours tweaking these values, I still could not feel it.
    • First of all, no matter what, the dashing still feels too instantaneous. She looked more like teleporting rather than gliding over a distance, which is what I actually wanted.
    • Second, it is so difficult to align with the timing from the provided animation and the special effect tied to that ability.
  • At some point, a line in the tooltip for the Add Impulse function caught my eye. It mentions about using Add Force. But this has to be done under a Tick function.
    (On that note, I just want to say UE >=4.2, >=5.0 is so well-documented now, as compared to when I started using it 10 years ago - UE 3.0).
  • Voila! Add Force does work pretty well. I do not had to tweak the Braking Friction at all. And I was able to match the ability with the provided animation and special effect with ease!

The Dash Ability Support Class

Do I place her abilities on the Main Character (Aurora) class? Do I create a component class and attach to the Main Character class instead?
I decided to just create a new Actor class where *everything* related to this ability is controlled. I felt it was a much easier approach.

  • I called it the "Support" class because anything that can help to correctly activate and run this ability will go here. My naming sense is open for constructive criticism.
  • This class shall be a persistent actor in the level. It is where it will "get" Aurora when the game begins and attach itself to her in the right orientation.
  • When the Dash ability is activated by player's input, it has to go through a sequence:
    • There is a brief warm-up.
    • It's followed by the actual Force effect, which has her gliding on the floor.
    • Then Aurora brakes with her heel and stops.
    • Cooldown runs before the ability can be activated again.
  • This sequence of events are controlled with the Timer Manager in C++.
  • The Dash ability does damage on any enemy in its path. It can stun and damage only one enemy.
    • This is intended as I placed a boolean in the collision delegate, so it can only overlap one actor until the ability ends.
    • It also give Impulse to the overlapped enemy. At the moment, it will simple move backwards, regardless of which direction it is facing.

Dash Ability Camera

I wanted players to feel like they were not able to catch up with Aurora's Dash.

  • In Mass Effect Andromeda, when the Charge ability is called, the camera widens its FOV during the warmup. For Aurora, I felt her warm-up (to match her animation at 1.0 speed) was too fast and does not suit.
  • To achieve this, I created a camera actor and placed it further back behind her. It is attached to the Ability Support class.
  • The camera will then "blend" to this from the Aurora character's own camera, only while she is gliding on the floor, hopefully giving players the feel that she is dashing too fast away from it.
  • However, when the ability is called, the camera will snap to be behind her first.
    • It made sense to me to do it this way, since I wanted to have such a Dash camera from behind her in the beginning.
    • If it was not done this way, it can have undesirable effect on the camera movement, making players even more nauseous. 🤮

What I Want to Improve

  • For the Dash ability to be able to stun and damage multiple enemies on its path, rather than just one.
    • I did it this way because there is a tendency for the collision box to overlap the same actor again, especially when the actor Impulses in the same direction Aurora is dashing towards.
    • Instead of a boolean, I can setup an array of FName. Each time the collision overlaps an actor, it takes the Name of it (on the level) and compares with the array (using String Literal) to see if it already overlaps it.
  • The direction of the enemy to move not just backwards upon being hit by the ability.
    • I can use Find Look At Rotation of the enemy at the Warm-up stage of the ability, and then move it in that direction instead when it is being hit.

Blast Ability

Reference

Taking reference from the Nova ability (if my memory serves me right, I think that's what it's called) in Mass Effect Andromeda. So cool, right? 💙

Implementation

  • The approach and setup is the same as with the Dash ability.
  • However, this time we have two spheres of collision.
    • The inner sphere is where the actual amount of damage and impulse is applied.
    • The outer sphere acts like a drop-off radius. At the moment, it only applies 0.5 of the actual damage and impulse amount from the inner sphere.
  • Enemies that are within the maximum radius will be affected by the Blast ability, making them stunned and take tremendous damage.

Camera and Visual Feedback

With the player camera setup for Aurora, which is at her eye level and not too far back, it would be quite difficult for players to perceive what has happened when the ability is activated in that short amount of time.

  • This is especially when enemies can run towards Aurora from any direction, the enemies that were affected by the Blast ability were often out of view.
  • Widening the FOV will make Aurora, and even the enemies around her, rather small and weird. I did not like the result from it.
  • Rather, I created another camera actor and positioned it such that it will always show the inner radius of the Blast ability. Players should easily see the enemies that were within that radius.
  • There should also be visual feedback to indicate which enemies are within that radius. Players should easily perceive this while in the Warm-up stage, just before the "blast" itself is activated.
    • Finding the right particle effects for this was not easy, I was not able to find the appropriate one.
    • So I heavily tweaked one Niagara particle system from a free pack (RPG Effects) to get what I needed.

The Crown and The Halo

Inspiration

There was an episode in Big Bang Theory where Amy was upset with Sheldon about something and was adamant that no amount of gifts or jewelry will uplift her but her mood quickly changed 180 to immense jubilee when Sheldon bought her a Tiara on advice from Penny.
I thought, "hmm... a tiara on Aurora will be so cool" 😆.

  • Scavenging the internet for a free 3D model of a tiara, I came across this crown instead (image below).
  • After reducing its poly count in Maya, I did not like how it looked on her. So I re-modelled to make it look like an actual tiara instead.


The original Crown model, a free 3D model from the internet, after reduced poly count.


The "Crown" after a re-model in Maya 2020.


Kawaii! 😄❤️

  • The level I created has these "wing" sections, the result of inspiration from the bridge in God of War (see the Level Creation section). I had not thought what it would be for.
  • So naturally displaying the headgears there would be a good idea. But then I need one more headgear.
  • The Halo came easily to mind. It would be so easy to make. Furthermore, I came across a jaw-dropping, awesome-looking material from the Props pack, that is appropriate for the Halo model.

Aurora Stats Buffs and Nerfs

When Aurora dons a headgear, there will be some buffs and a nerf to her combat stats.

  • Crown of Queen Aurora
    • Extend Sword Reach - Behind the scenes, the length of the sword collision box is extended by factor of 1.5. This also adds the ability to damage even enemies behind an enemy. I wanted to place an additional particle effect to the end of the sword to indicate this but I figured the change of the sword trail should be enough.
    • Increased Sword Damage Attack Speed by 25% - I had setup a separate montage and trim the end of all 3 attack animation. Upon donning this headgear, the attack animation will play from this montage instead.
    • 2 more Health fragments will always spawn from Enemy's death - Simply tell the Enemy actor, which Aurora already got from sword collision, to spawn more fragments. I had to add 1 more argument to pass that information.
    • (Curse) Increase Damage taken
  • Halo of Paragon's Angel
    • Decreased Energy usage per Ability call
    • Shorter Exhaustion Recovery Duration - Actually, simply increase the recovery rate. This avoids having to adjust the related UI real-time, have I decided to reduce the Minimum Threshold (the gap in the Energy Bar) instead for example.
    • 2 more Energy fragments will always spawn from Enemy's death
    • (Curse) Decreased Sword Damage
    The final decisions on the buffs and nerfs above are made based with the thought that I do not have to manipulate / adjust the UI in real-time. This saved a good amount of time.

Headgear Display and Area Barriers

The headgear display and the barriers that go up when enemies are spawned, are Blueprint classes of their own. The headgears communicate with these objects in the level via its dynamic multicast delegates so I can assign and broadcast them not only in C++ but also in Blueprints of different, multiple objects!

  • The barrier guarding the Headgear Display will not go up if Aurora has equipped that related headgear at least once.
  • The Headgear Display will "de-activate" when Aurora equips the headgear on that display.
  • If Aurora equips a headgear on display, while she already has equipped the other headgear, this other headgear will be put back to its display. That display will "re-activate".
  • The "screen" that comes up for each display was a design solution. Initially for afar, players would not be able to discern anything because it was too small.

Lessons Learnt

  • When developing a new feature, it's best to test it out on Blueprint first before committing it to C++. It takes time to build/compile a project and can be frustrating at times when i have to compile at every iteration.
  • On the other hand, if I intend to develop a new feature on Blueprint, create the C++ class of it first. Because you never know if you may want to commit it to C++ later on. This happened to me a few times. Then, I encountered issues when I try to create the C++ class after.
  • No harm in exposing ALL (this can be debated) public variables in a class to Blueprint, unless you're absolutely, very certain it is not going to be used elsewhere. Again, compiling projects is time-consuming.
  • I have to be more careful in using anim notifies in montages. I would only use it when I know for certain the function WILL be called at that stage of animation. I came across many a confusing bug that is caused by the animation being interrupted before the anim notify is called.

Get In Touch

I can be contacted via email. 181mdelamore@gmail.com

Social